Showing posts with label kitchen. Show all posts

Monday, June 11, 2012

The Final Touch to the Kitchen

We installed our new dining room light fixture yesterday. I can officially say that every single "to do" item on the kitchen list is now complete. I got this fixture through work when we closed our showroom. I did have to buy one of the glass bowls because one was broken, but well worth it.

Now to complete all the other "to do's" for every other room...

Wednesday, April 18, 2012

Drawers for the Kitchen

Our kitchen not only got a facelift but it needed some help in the efficiency department. Part of that was fixed by swapping the refrigerator and cabinets. But another issues was our pantry. It isn't very large to begin with, but it's also narrow and deep which really limited the usable space and I easily forgot what I had shoved way back in the shadows. To remedy this I decided to add drawers to not only the pantry but all the lower cabinets in our kitchen. After shopping around I realized that there were very few size options in ready-to-buy drawers and to purchase custom built drawers was quite and investment, so I decided to build my own. I could maximize my space and save some money. I ended up building the drawers for about $25 each.
Here's how I built them. I used 3/4"x4" wood for the the drawer sides. I cut the drawer fronts and backs a half inch short of the width of my cabinet opening. Then I cut the sides 1 1/2 inch short of the depth I wanted my final drawer to be since the front and back would add 1 1/2 inch of depth to my final drawer.
Then I cut the bases for my drawers from 1/4 inch thick wood. I used my already cut drawer front to be sure my table saw was set to the exact same width for my drawer bases, rather than trying to measure perfectly.
I did the exact same thing to cut the drawer bases to the exact depth and included the drawer front and back stacked against the side.
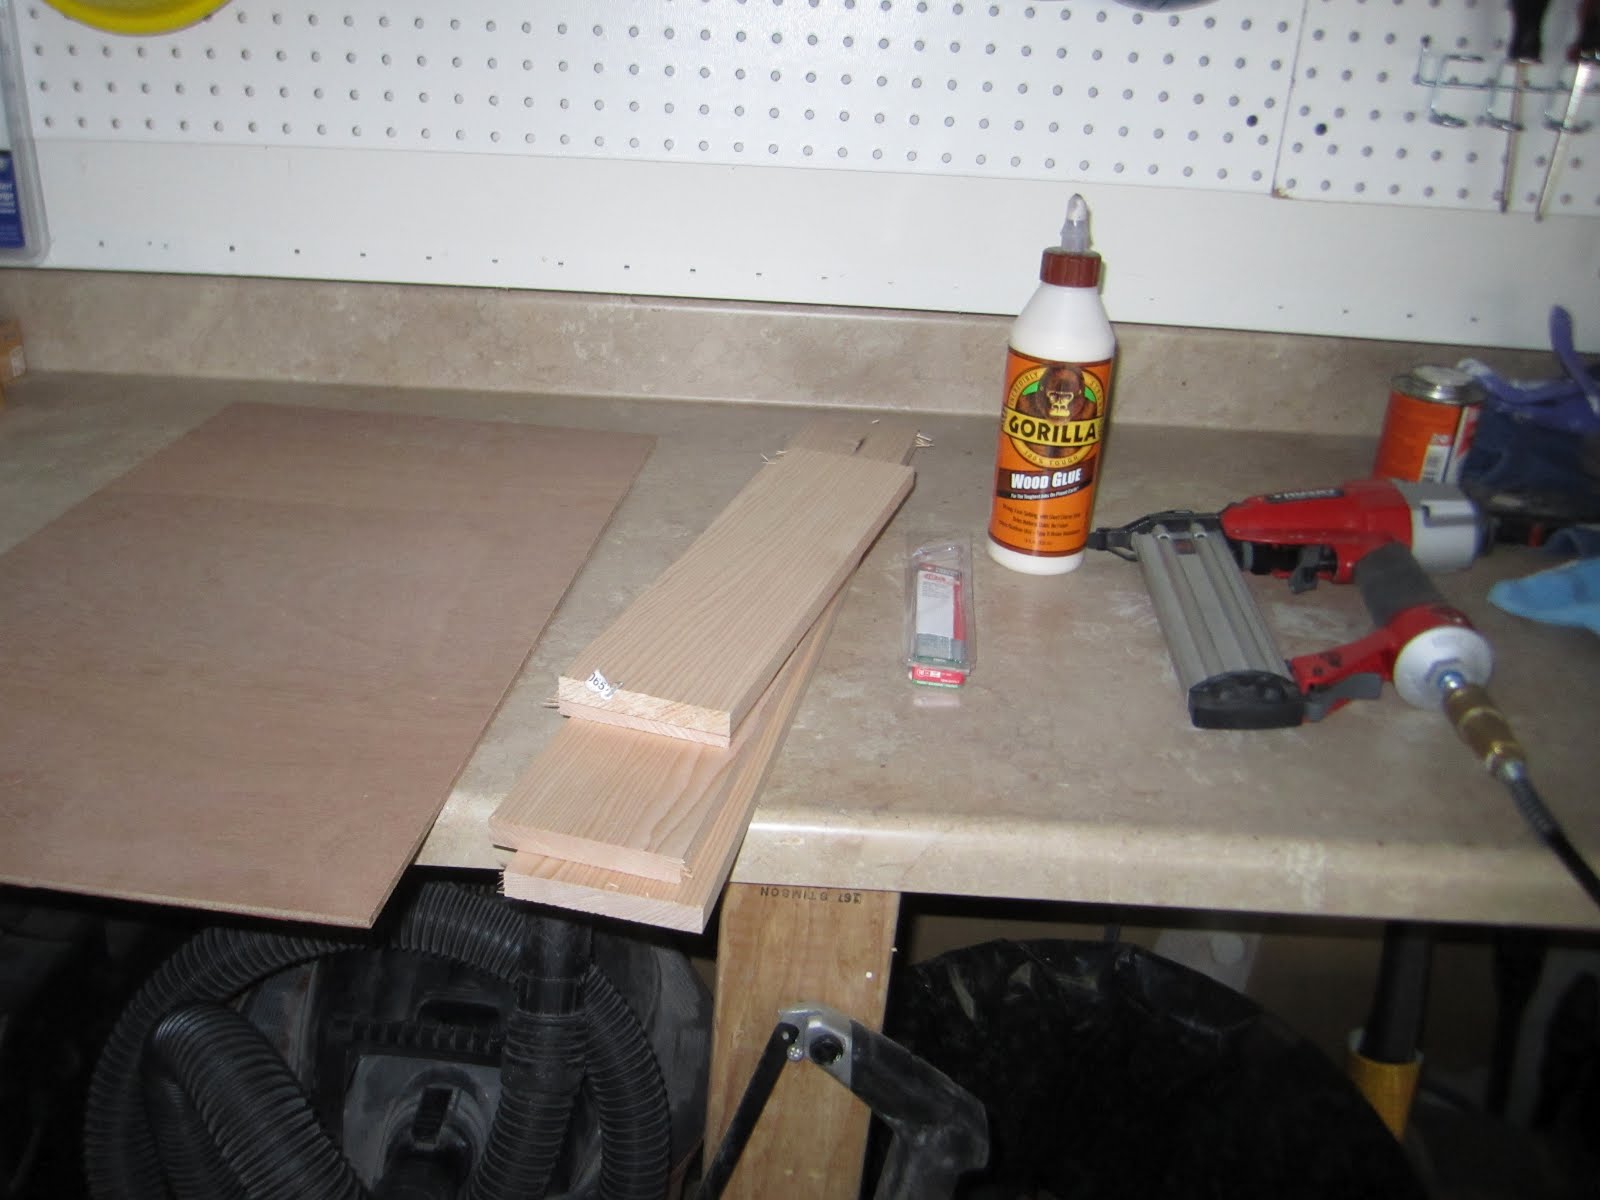
Once I cut all the pieces for all my drawers I started assembling using wood glue and a nail gun with 1 1/4 inch nails.
I used wood glue on all my joints and nailed the front and back of the drawer to the sides.
Then I attached the drawer base with wood glue and then nailed it in place.
It took me about 2 hours to cut and assemble 7 drawers (after my initial trial run with the first 4 drawers). I did 11 drawers in total throughout the kitchen.
I attached full-extension drawer slide to my shelves and then attached those to the base of my drawers. Because my drawer slides are attached to the base of my drawers, and not the sides, I'm not worried about the contents of my drawers being too heavy and causing the bottoms to fall out over time. The weight is supported by the shelves already in my cabinets.

Sunday, April 8, 2012

Completed Cabinets

The lower cabinet doors went back on the cabinets and I put new brushed nickel hardware on all the doors and drawers. We also ended up replacing the dishwasher last minute after the water supply line started leaking.

Monday, March 26, 2012

The New Counters Have Arrived

So far our kitchen and floor renovation have gone much faster than our master bath reno (I was not looking forward to living in a construction zone for months). We were only on sub-floor for about 2 weeks and I've only been without the kitchen sink for 4 days. The new counter and sink were installed today! We just have to wait 24 hours to hook the plumbing back up to give the sink caulk time to cure. We are going to be back in business in no time. The next thing I need to do is get my drawers and doors painted to they can go back on the frames.

Saturday, March 24, 2012

Hello Shiny New Floors!

DAY 1: We had already torn out all the carpet in the living room and hallway, but the carpet also went partially up the side of the fireplace. We remove that along with all the hideous little brown tiles covering our monster of a fireplace.
There are 3 generations demoing the fireplace.
Then we added new drywall to the fireplace surround. It already looks so much better.
We also removed the lower cabinets in the kitchen and swapped the upper cabinets so that the fridge could be moved to the left. In its current position the door blocked the pantry and hits the oven. This should be lots more functional :)
DAY 2: We painted the kitchen blue, I removed the drawers and doors to prep them for paint AND Tracy and Andrew started laying the new wood floor.
DAY 3: More flooring went down and since we had access to the downstairs ceiling through the sub-floor, we replaced the light/fan to the guest bathroom.
DAY 4: More flooring went down and they managed to make it into the kitchen from both sides of the wall and match up. Yay!
DAY 5: The kitchen floor is complete. Andrew and Tracy started off the day by ripping out the counter with the sink and pulling out the lower cabinets and dishwasher. They finished laying all the wood flooring and had the lower cabinets and dishwasher back in place before dinner :)
DAY 6: The last day! They finished laying the living room flooring today and, AND THE THEY ARE BEAUTIFUL! I will have to post some before picture for comparison, but what a difference. Everything feels bigger and oddly enough this made our floors quieter I think. Super thrilled!

Tuesday, March 6, 2012

The Doors Go Back Up

I put the upper doors back on the frames. Attaching them was fairly easy. I set all my hinges two inches inside the edge of the door. I laid the hinges on the door, marked the holes, drilled pilot holes for the screws, then attached the hinges to the door. Then I held the door up to the frame, made sure it was level, marked the hinge holes on the frame, drilled pilot holes then attached the door to the frame.

Thursday, March 1, 2012

Door Fronts and an Open Shelf

I really like the look of open shelving and could always use more storage in the kitchen. I have several examples collected on pinterest. So, I added a shelf above the kitchen sink. I used wood shelf brackets and a pine board to make the shelf. I counter sank and filled all the screw holes, then caulked all the edges so that (hopefully) once painted it would look more like part of the cabinets rather than an added shelf. I think it will make more of a statement once the walls are painted a darker color.
The door front also got their two coats of paint. I am going to let them set 24 hours before attaching them to make sure they are fully cured.

Saturday, February 25, 2012

Doors Come Down, Floors Come Up

I took down the upper cabinet doors and began painting. I cleaned everything with a deglosser. I removed all the hinges, patched all the holes with wood putty, and then sanded everything.


These are the primed cabinets. I did not work on the pantry or the lower cabinets since they are going to have be pulled out to lay the new floor. I didn't want to worry about scratching a new paint job. They will get done after the new floors are laid.
I laid all the doors out in the garage propped up on wood blocks and used a space heater while painting. I learned from painting the test cabinet that the temperature made a big difference in drying/curing time for the latex/oil paint. I have only done the first two coats on the backsides of the doors. I am letting the doors set overnight before I flip them and give the fronts of the cabinets 2 coats.
Andrew pulled up the carpet that runs down the hall by they bathroom and laundry room and then started pulling up the dining room area floor.
Andrew is leaving the flooring in the kitchen area for later since he'll have to move the lower cabinets and undo plumbing.